If you’re even remotely serious about your home gym, you’re going to want a barbell. Barbells are simply unmatched for strength training, as they provide maximum scalability as per the “Progressive Overload” principle. But, to an untrained eye, barbells all look pretty similar, and how many people actually understand knurling, tensile strength, diameter, whippiness, and all that jazz? And most importantly, how do you make a good purchase and stay out of trouble? Well, this guide will cut through the noise and tell you the only three things that really matter for your home gym’s first barbell.

So, what are the top priorities?
The Only 3 Things That Really Matter for your Home Gym’s First Barbell:
Priority #1: The Right Dimensions (7ft, 45lb, 2-inch sleeves – the non-negotiables).
There’s basically two kinds of barbells: the “standard” and the “Olympic”. I use scare-quotes because the names are semantically misleading. “Standard” barbells tend to be about 5 to 6 ft long, and about 1″ in diameter. They’re common in “old school” home gyms. As a teenager, I wanted to bench press at home. We bought a flimsy little bench rack at a Big Box store, and the barbell/weight plate setup was “standard”. It worked fine for a while, but their weight capacity is limited, and I outgrew it quickly.
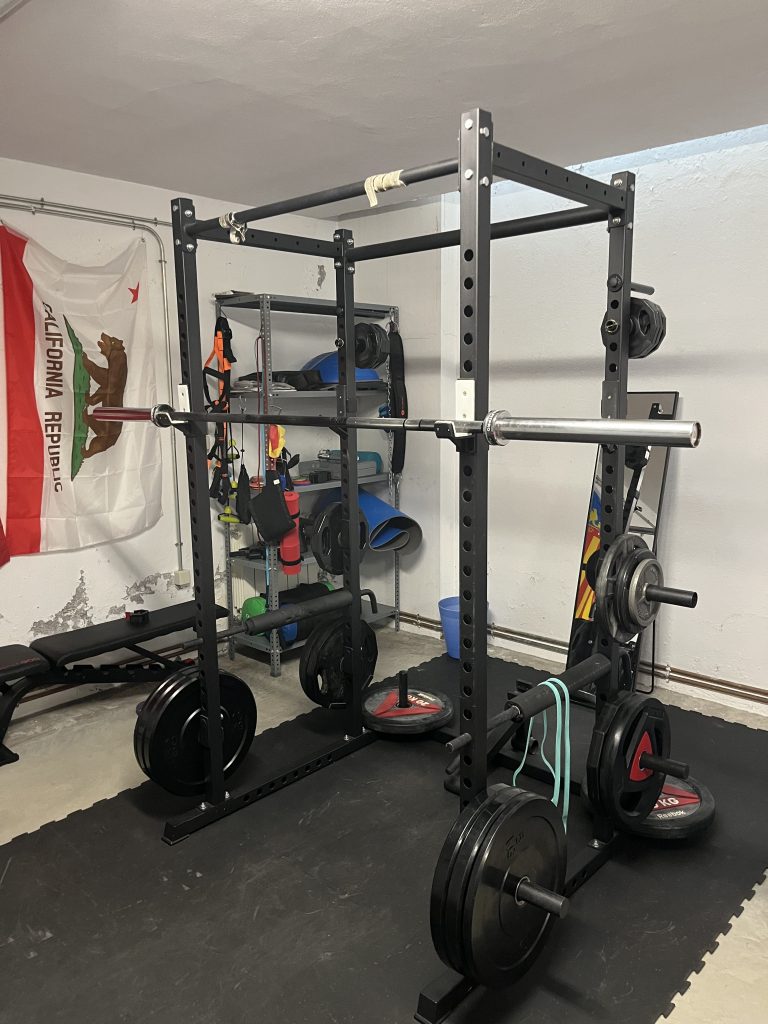
That leaves us with the “Olympic” barbell. This is what you find in most commercial gyms, even though most athletes aren’t using them for Olympic lifts, and the versions in commercial gyms are rarely optimized for Olys. Nevertheless, that’s what they’re called: for men, these are 7ft, 45lb bars suited for weight plates that have a 2″ diameter hole in the middle. You grip the bar at a diameter between 28 to 29mm, which is thicker than with “standard” barbells. The cheapest Olympic barbells can be loaded up to well over 500lbs; likely 700lbs. If they’re any good at all, they could take 1,000lbs, and while they will bend (and “whip” is desirable for Olympic lifters), they won’t break.
For women, the Olympic barbell is 6ft long, weighs 35lbs, and generally is gripped at 25mm. Otherwise, they’re basically the same as a man’s barbell.
As I said, my first barbell was a “standard” barbell, and once I gave my cousin a “standard” set as a birthday gift, but this was largely to adapt to his floor and storage space. It also suited his light weight, high-rep preference for training.
But, for just about everyone else, I strongly recommend the Olympic barbell setup as a first barbell for a home gym.
Priority #2: The Finish (Feel vs. Rust Protection)
The finish on a barbell is a practical choice between how the bar feels in your hand and how well it resists rust in your specific environment.
- Hard Chrome: This is the industry standard for a reason, and it’s what you find in a commercial gym. It’s that shiny steel look. Further, it’s very low-maintenance and offers great rust protection, making it ideal for a garage or basement. The trade-off is that the coating can make the grip feel slightly slicker than bare steel.
- Black Oxide: This finish provides a much better grip because there’s less material between your hand and the steel itself. However, it offers minimal rust protection and will require occasional wipe-downs with oil to stay in good condition.
- Stainless Steel: This is the premium “best of both worlds” option. It provides the great grip of an oxide bar but has rust resistance that is even better than chrome. As you’d expect, this performance comes with a higher price tag.
My home gym barbells are hard chrome, and in some cases, the grip area is painted in black zinc. But they’ve been more than good enough for me. I’m getting commercial gym-quality at home. Not bad for a first barbell for a home gym.
Priority #3: The Right Price
I’ll die on this hill: it’s hard to find a quality 7ft barbell for under $100, but I find it even harder to justify going much over $200, especially for a first barbell for a home gym. $150 is a very good budget for a general purpose barbell that will serve for both the “slow lifts” like bench press, squats or deadlifts, but also for Olympic lifting variants. Most aspirational home gym owners will practice slow lifts; many will dabble in Olympic lifting variants; and very few train specifically for Olympic lifts. If you’re a highly specialized athlete, there’s a case for splurging on the barbell, but truth be told, for the vast majority, if you’re doing this, it’s discretionary, not necessary.
3. What Doesn’t Matter (Yet/As Much) for a Home Gym’s First Barbell?
Tensile Strength
Tensile strength measures the maximum stress a material can withstand before it starts to permanently deform or break. It’s measured in Pounds per Square Inch (PSI). Imagine pulling on a steel rod from both ends; the PSI value tells you how many pounds of force could be applied to every square inch of that rod before it’s compromised. A higher PSI rating means a stronger, more durable steel that is less likely to bend permanently under heavy loads.
High-end barbells have tensile strength over 190,000 PSI. For a home gym user, 150,000+ PSI is perfectly reliable. My barbells have usually been in the 160,000 to 165,000 range, and I’ve never felt the need to have more. They bend slightly when they’re racked with over 300lbs, which sounds about right. Plus, it kind of looks and feels cool. They’ve never had a single issue.
Knurling:
“Knurling” is the etched crosshatch pattern on the parts of the barbell you grip. Its job is simple: to increase friction so the bar doesn’t slip out of your hands. All decent barbells have it. While advanced lifters might debate the merits of “aggressive” vs. “passive” knurling, for your first barbell, this is not a detail to worry about. Any standard knurling will provide the grip you need to train safely and effectively.
And, if anything, if you go unconventional, you risk purchasing something that doesn’t match what you’re used to at all from the commercial gym. This is rarely a space where you want to get creative.
Put it this way: if you don’t know what specific knurling you need, then you need standard. Remember, this is your first barbell for a home gym, and this particular variable is not a dealmaker or dealbreaker.
Bearings vs. Bushings:
Inside the sleeves (the ends of the barbell where you put the weights), there is a mechanism that allows them to spin independently from the bar. This is crucial for exercises like cleans or snatches to prevent wrist strain.
Bushings are simple, low-friction rings (usually bronze) that sit between the bar and the sleeve. They provide a good, reliable spin and are extremely durable.
Bearings (specifically needle bearings) are composed of small needles that allow for a much faster, smoother, and longer spin.
Not only is there the matter of category, but there is the number of each.
I’ve usually bought bearings barbells, usually from 2 to 4, though 8 is the gold standard. I think 4 is the sweet spot. But that’s because I do enjoy some Olympic lifting. For general strength training—squats, bench press, deadlifts, and even basic Olympic lifting—bushings are perfectly fine and are the standard for bars in the budget-friendly to all-arounder price range. The super-fast spin of bearings is really only necessary for competitive Olympic weightlifters who need every possible advantage (or, as is the case with consumers, just because it’ll make you happier).
4. Our Top 3 “First Home Gym Barbell” Picks
Now for the fun part. What should we buy? (Note: All prices are based on my last update in mid-2025 and are subject to change.)
If you’re leaning towards Olympic lifts with a Sub-$200 budget…
The Logic: If you’re performing Olympic lifts (or even just dabbling with power cleans), you need a bar that spins fast. This is non-negotiable for protecting your wrists and ensuring a proper catch. The key feature is needle bearings, which allow the sleeves to rotate smoothly under load. Historically, this feature came with a high price tag, but a few high-value brands now offer it at a price that’s accessible to everyone.
Our Pick: The Synergee Open Bar
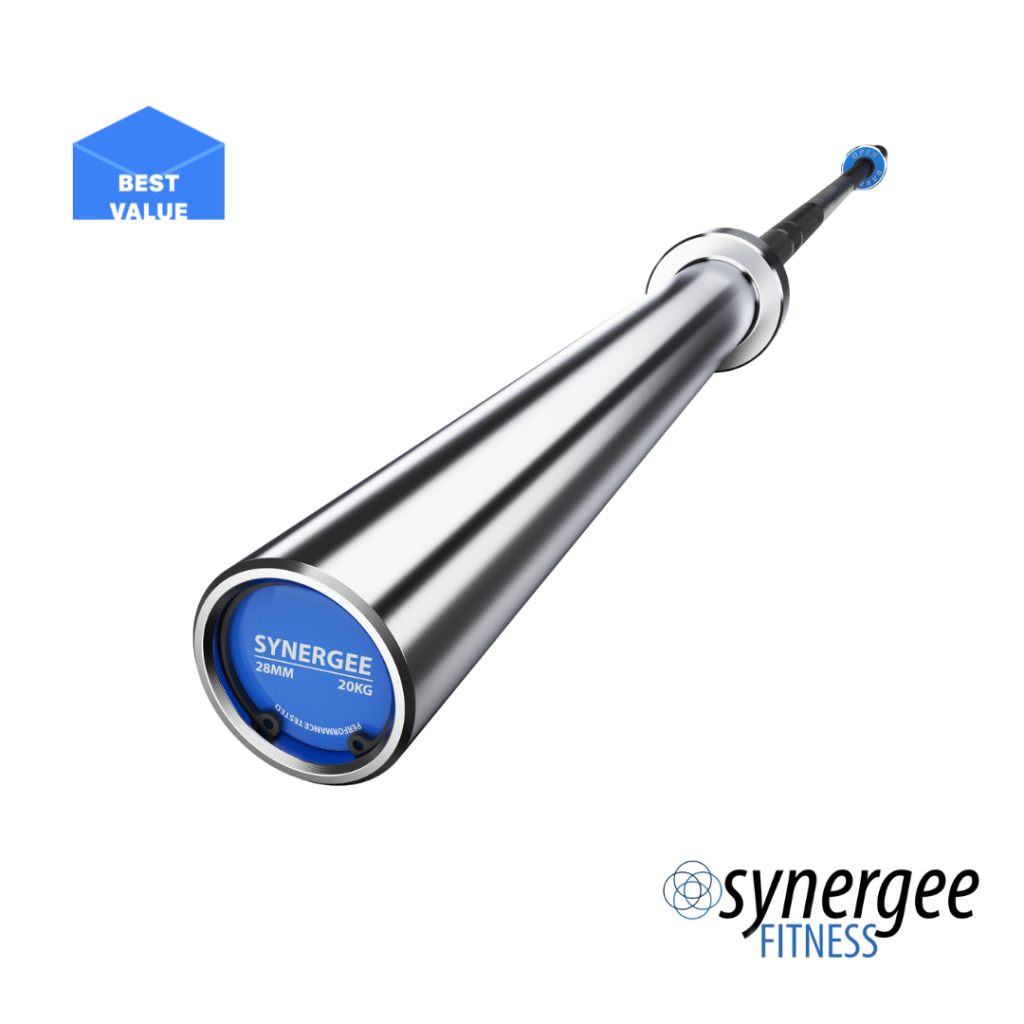
Why: The Synergee Open Bar is our top recommendation for the “Best Value Olympic Bar.” It delivers the key features of a dedicated Oly bar—a whippy 28mm shaft and fast-spinning needle bearings—at a price that won’t break the bank. Whether you’re training the full competition lifts or just want a high-performance bar for dynamic movements, this is the smartest value on the market.
If you’re leaning towards a Powerlifting bar with a Sub-$200 budget…
The Logic: If you have no plans to perform the fast Olympic lifts, then your focus is on the “big three”: squat, bench, and deadlift. For these heavy, slow lifts, you want a stiffer, thicker bar. A 29mm shaft provides more rigidity and feels more secure on your back during heavy squats. A center knurl is also a key feature, as it helps the bar “stick” to you during squats.
Our Pick: The Titan Fitness Performance Power Bar
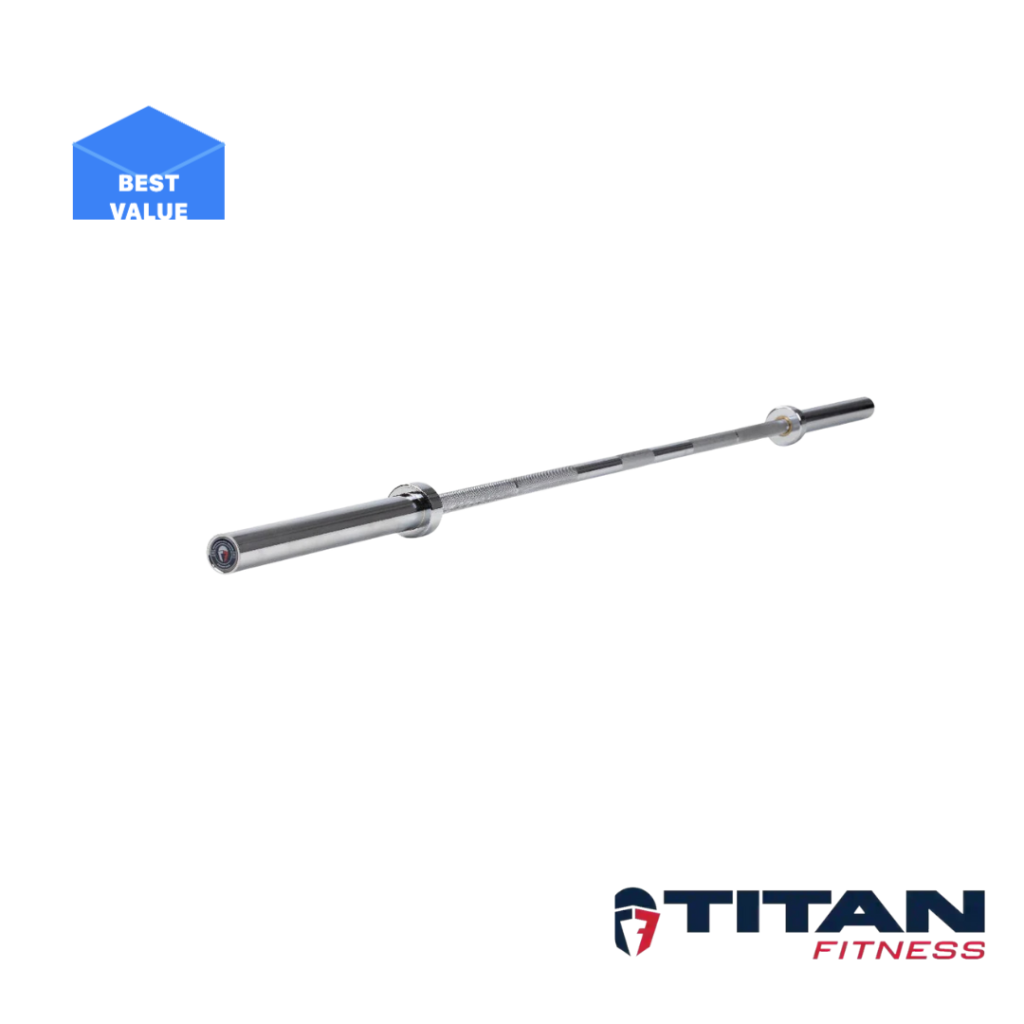
Why: The Titan Performance Power Bar is our top pick in this category. It delivers the ideal 29mm shaft and a medium center knurl that provides excellent grip without being overly sharp. For the lifter who wants to build their training around the classic strength lifts, this bar offers the key features of a dedicated power bar at an entry-level price.
You’re looking for good value in an All-Arounder bar
The Logic: What if you want to do it all? CrossFit, powerlifting, and general training? Then you need a hybrid bar that hits the “sweet spot.” This means a 28.5mm diameter shaft (right between Oly and Power bars) and dual knurl marks so you can set your grip correctly for any lift. It’s the most versatile choice for the lifter who wants maximum flexibility.
Our Pick: The Vulcan Bravo Barbell
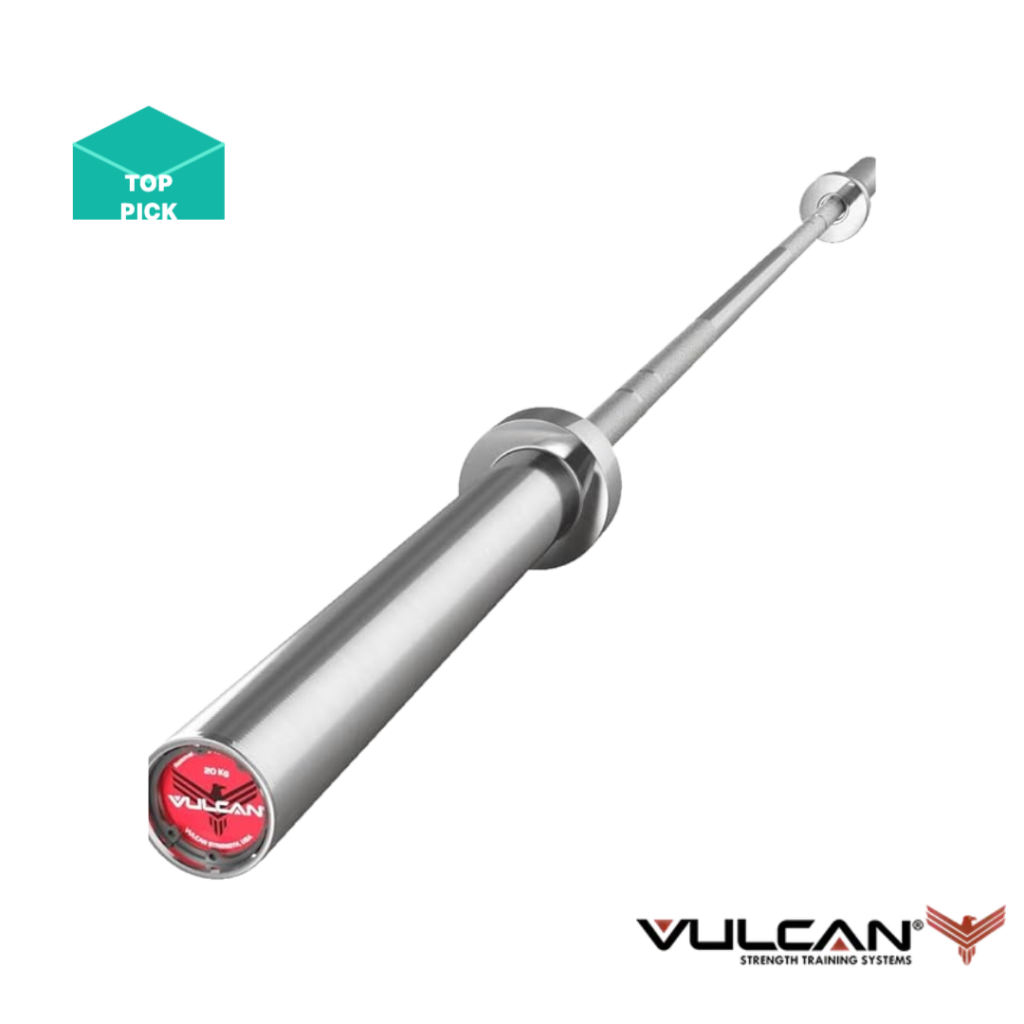
Why: The Vulcan Bravo is our top pick for the “Best Value All-Arounder.” It hits that perfect 28.5mm “sweet spot” diameter and has all the features of a high-quality, versatile bar—dual knurl marks, a solid 165k PSI tensile strength, and a durable chrome finish. Vulcan is an extremely respected specialist brand, and getting one of their bars at this price point is a huge win. For the vast majority of lifters who want a “buy once, cry once” bar without the crying, this is it.
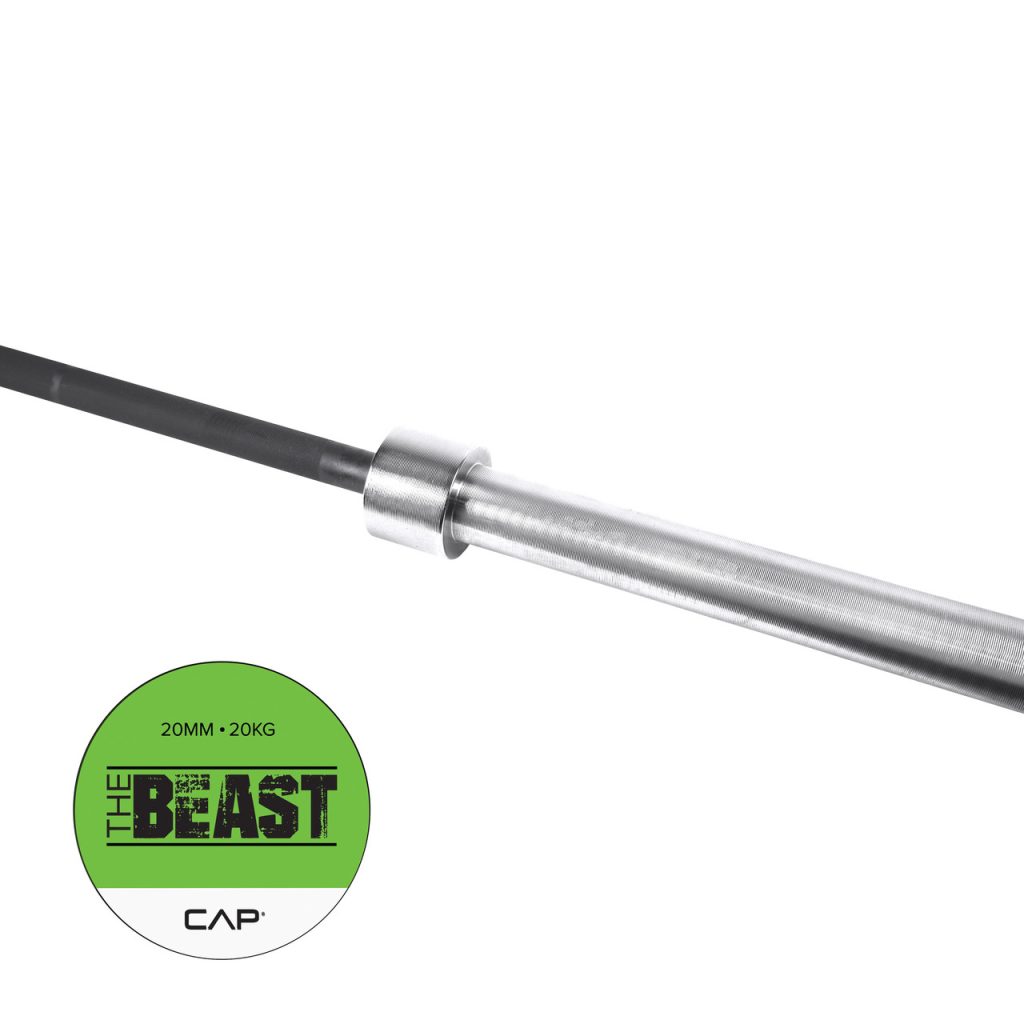
The budget pick: CAP Barbell Beast Bar
We mentioned it earlier, but if you’re really tight on budget, it’s quite easy to buy a crap barbell you’ll regret. Most ‘budget’ vendors are no-names and don’t even know what they’re producing, really. CAP’s offering is inferior to the recommendations above, but they have a long enough track record in the budget space that you know what you get with them, and it’s perfectly valid to train and obtain gains with.
Conclusion: Your First, and Possibly Last, Barbell
When it comes to buying your first barbell for a home gym, don’t get lost in the noise. The path to a great decision is straightforward:
- Nail the Dimensions: Start and end your search with a standard 7ft, 45lb Olympic barbell. It’s the universal standard for a reason.
- Pick a Finish for Your Reality: Choose a practical finish that suits your environment and maintenance preference—whether that’s low-fuss chrome or great-grip oxide.
- Buy for Your Budget: A solid, reliable bar doesn’t need to cost a fortune. A budget between $150 and $200 will get you a fantastic piece of equipment that will last you for years.
Now that you’ve chosen your barbell, see how it fits into a complete, budget-friendly setup in our Ultimate Starter Home Gym Guide.